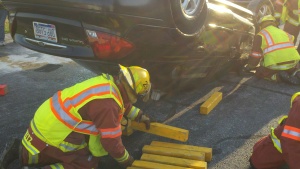
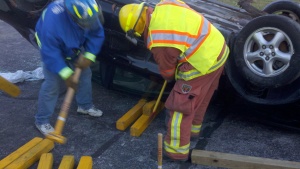
I’ve been on somewhat of a rant about getting back to the basics with some extrication techniques lately. Mainly because we sometimes get overzealous in our efforts to use the most fancy electric, hydraulic, or pneumatic tools. Tunnel vision, maybe. Remember, you may need two or three options to perform a rescue. Keep it simple, fast, and safe.
A recent training opportunity allowed the same scenario to be set up 6 times. The firefighters were told to perform the rescue the first time as they would if they arrived on this scene that night. After each evolution, they were challenged to come up with a different option to perform the rescue. We got back to the basics of work and mechanics after the first 3 attempts. The times to complete the rescue with the varying techniques are recorded below.
Scenario: passenger car roll-over pinning due to ejection. The victim was pinned under the roof of the vehicle.
1st Attempt: Airbags from the side closest to the victim.
- Step chocks were placed on the opposite side of the vehicle.
- Cribbing was used to fill the voids as the lift was performed.
- Time of rescue: 12 minutes.
2nd Attempt: Airbags on top of box cribbing, lifting the rear of the vehicle.
- Step chocks were placed under the front bumper of the vehicle.
- Cribbing was used to fill the voids as the lift was performed.
- Time of rescue: 8 minutes (*using the airbags in the previous attempt decreased the time a bit, I think).
3rd Attempt: Electric winch in the receiver of the fire apparatus, cable hooks secured to the rear axle of the vehicle.
- Step chocks were placed under the front bumper of the vehicle,
- Note the jacket on the cables. In case of cable failure, the weight of the coat will push the cable to the ground instead of whipping wildly.
- Time to rescue: Not successful due to sliding of the vehicle. No vertical lift.
4th Attempt: Using a prying tool to lift in at least to places.
- Step chocks were placed on the opposite side of the vehicle.
- They had one pry bar and a 4′ 4×4 on the rig.
- Cribbing was used to fill the voids as the lift was performed.
- Time to rescue: 1 minute.
5th Attempt: Wedges and striking tools.
- Step chocks were placed on the opposite side of the vehicle.
- See more on using wedges for heavy lifting
- Cribbing was used to fill the voids as the lift was performed.
- Time to rescue: 4 minutes.
- Step chocks were placed on the opposite side of the vehicle.
- A purchase point was gained by breaking out the window between the A and B posts.
- See more on using high lift jacks
- Time to rescue: 1 minute.
Pass it on!


